
 THIS VIDEO EXPLAINS THE EXPECTATIONS FOR THE DAY!
Our 1st semester will focus on media creation, while or 2nd semester will focus more on coding.
Regardless of the lesson, FouloisTech.info should be your destination every time you come into class. This space will be used to provide announcements, lessons, and other resources.
-
- So You Want To Be A Media Arts Major...
- Objective:
- Students will create animated GIF files to better understand the versatility and limitations of different video formats.
 Announcements:
- No late work for this Quarter will be accepted as it is now after Thursday, October 16th!
- This deadline was included in every lesson since our first day of class.
- It is here to provide time for make-up work to be graded before the end of the Quarter.
- Exceptions are made for excused absences, but work must be handed in no later than 1 day per day absent. For most Primary students, including early dismissals, that is the NEXT school day.
- Previous lessons: Audio 1, Audio 2, Audio 3, Audio 4, Audio 5, Video 1, Video 2, Video 3, Video 4, Video 5, Video 6, Graphic Design: Personal Logo, Animated GIF
- No late work for this Quarter will be accepted as it is now after Thursday, October 16th!
- Today's Lesson: Graphic Design: Animated GIF
- Today we're going to try something Mr. Smith really enjoys making: animated GIFs.
- Ideally, you should be starting with the logo you made during our previous lesson, but the techniques remain mostly the same even if you're using a different image.
- Begin by going to WeVideo and logging in with your PGCPS Google Account.
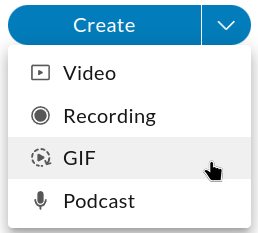
- Click the arrow next to "Create" and select "GIF." Other options could also work but this will make sure whatever we make CAN be turned into a GIF.
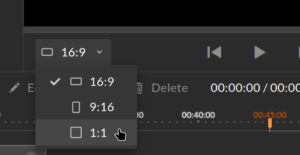
- Before you add anything else, it's a good idea to change WeVideo's Aspect Ratio. Usually it's a good idea to keep it at 16:9, but for this a 1:1 ratio (which makes a square) could work quite well.
- Import your logo from Graphic Design 2 or another image you've made. It should NOT be an image you found online, as you likely won't have legal permission to use it.
- Drag your image into the timeline. Normally I'd say to stretch it to be as long as you want, but for this you might benefit from dragging it into the timeline multiple times.
- Now it's time to play around with the image, using the settings you see when double-clicking on it, adding filters, transitions, and/or effects.
- Mr. Smith will show you some examples in class, but you DON'T have to copy them.
- There's no real rule for which of these should be used in what way. Try things, and if you don't like them, hold the "CTRL" key and tap the "Z" key (the Undo command) to make them go away.
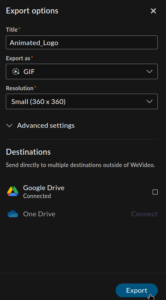
- When you're ready to save your work, click the "Export" button on the top right of your screen. (You might have to scroll up!)

- Give your GIF a good name and a small-ish size. (Small GIFs are easier to share!) When you've done that, click the "Export" button at the bottom.
- This next part can go really fast or feel like it's taking forever, depending on many things that you can't control. Eventually your GIF will finish and be ready to download.
- Today's grade can be earned by going to Canvas and sharing what you noticed, learned, and/or liked about today's lesson.
- Don't forget to proofread! Writing like the shift key and all the punctuation keys on your keyboard are broken will cost you points!
- If you can share your GIF, please do. If the GIF isn't done exporting, it will not lower your grade to JUST write the sentence.
- This is an IN-CLASS assignment, NOT HOMEWORK. Please stay on task to complete this work by the end of class!